I was sitting on my kitchen floor last Tuesday, surrounded by a chaotic sea of dried grey splatters and half-finished bowls, wondering why I felt so much more inspired by this mess than by my pristine, high-tech VR setup. There’s a common misconception that you need a massive, ventilated industrial warehouse to truly master your craft, but honestly? That’s just a myth that keeps so many brilliant makers stuck in the “someday” phase. Learning how to build a home pottery studio isn’t about replicating a professional factory; it’s about creating a sacred choreography between your physical space and your creative spirit, even if that space is just a corner of your spare bedroom.
In this guide, I’m stripping away the glossy, intimidating perfection you see on social media to give you the real, grit-under-your-fingernails truth. We’re going to walk through the practicalities of sourcing equipment, managing the inevitable dust, and organizing your workflow so your home remains a sanctuary rather than a construction zone. I promise to share the no-nonsense essentials you actually need to get your hands dirty, helping you transform a simple nook into a soulful workshop where your ideas can finally take shape.
Guide Overview
Tools & Supplies
- Pottery wheel for shaping clay
- Kiln for firing pieces
- Pottery bats for rotating work
- Sponges for moisture control
- Wire cutter for slicing clay
- Rib tools for smoothing surfaces
- Clay 50-100 lbs for starting
- Glazes assortment for coloring
- Shelving units for drying racks
- Water buckets for cleaning
- Kiln wash for protecting shelves
Step-by-Step Instructions
- 1. First, we need to scout for your “digital canvas”—or in this case, your physical one. Finding the right corner of your home is a lot like allocating memory in a computer program; you need enough space for the process to run smoothly without crashing into your living room sofa. Look for a spot with a solid floor (think tile or linoleum rather than carpet) and, most importantly, easy access to water and a window. A little natural light can be the secret ingredient that keeps your creative spark from flickering out during those long afternoon sessions.
- 2. Next, let’s talk about the “hardware” of your studio: your wheel and kiln. Choosing a pottery wheel is similar to picking out a high-end MIDI controller; you want something that responds to your touch with seamless precision rather than fighting against you. If you’re planning on getting a kiln, please, please treat this like a high-voltage server rack—it needs its own dedicated circuit and a breathable environment to ensure safety and prevent your home from becoming a literal sauna.
- 3. Now, we have to set up your “data storage”—your shelving. In the world of tech, we organize files into neat folders, but in pottery, we organize wet, heavy pieces into sturdy, tiered shelves. You’ll want something that can handle the weight of damp clay without buckling under the pressure. I like to think of shelving as the rhythm section of your studio; it provides the steady, reliable foundation that allows the melody of your shaping and glazing to take center stage.
- 4. Let’s get messy with your “input devices,” which are your various tools and clay bodies. Instead of just throwing everything into a bin, try organizing your ribs, sponges, and trimming tools in a way that feels intuitive to your workflow. Think of it like a well-mapped keyboard shortcut—you shouldn’t have to hunt for your favorite needle tool when you’re in the middle of a flow state. Having your clay pre-wedged and ready to go is like pre-loading a heavy asset in a VR environment; it just makes the whole experience smoother.
- 5. Don’t forget the “cleanup script”—the most vital part of the loop! Pottery creates a lot of “noise” in the form of clay dust, and breathing that in is a big no-no. Set up a dedicated station for washing your hands and tools, and make sure you have a way to manage your wastewater so you aren’t sending heavy silt straight into your plumbing. A simple two-bucket system acts like a buffer, catching the particles before they can clog up your home’s internal systems.
- 6. Finally, create your “user interface”—the aesthetic soul of your space. This is where you bridge the gap between a mere workshop and a true sanctuary. Hang some art, maybe a few dried botanicals, or even a small digital screen playing some ambient visuals to keep your inspiration high. When your studio feels like an extension of your identity, you’ll find that the transition from the digital world to the tactile world feels less like a jump and more like a beautifully choreographed dance.
Pottery Studio Space Planning Mapping Your Creative Sanctuary
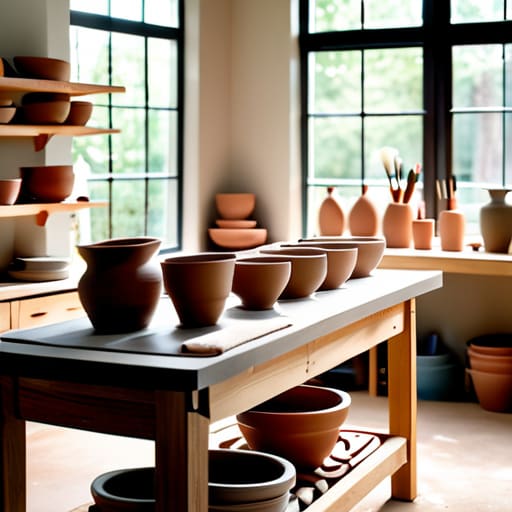
Think of your studio layout like the choreography of a dance; you want your movements to be fluid, not a series of awkward collisions with your own tools. When you’re diving into pottery studio space planning, try to visualize the “flow” of your process—from the moment the raw, heavy clay arrives to the final, delicate stage of glazing. You don’t want to be hauling buckets of water across the room every time you need to wedge, just like you wouldn’t want your computer’s CPU to overheat because the cooling fans are blocked by a pile of old sketches. Keep your heavy lifting near the entrance and your delicate finishing work in a calmer, more controlled corner.
Don’t forget that your sanctuary needs to breathe, too. Just as I meticulously manage the airflow in my VR setups to keep the hardware happy, you’ll need to consider pottery studio ventilation requirements to keep your air fresh and free of fine dust. It’s about creating an environment that supports your lungs as much as your imagination. If you can, position your workspace near a window to catch that natural, soft light, which can be a total game-changer for seeing the subtle textures and true colors of your glazes.
Essential Pottery Equipment for Beginners Curating Your Digital to Earth to
Think of gathering your gear like assembling a new synthesizer: you don’t need every knob and slider on day one, but you do need the right interface to translate your intentions into sound—or in this case, from your imagination into clay. When I’m navigating a pottery wheel selection guide, I always remind myself that the wheel is your primary conductor. It’s the heartbeat of your studio. Look for something with steady torque; you want a machine that feels like a reliable partner in a waltz, not a temperamental glitch in your creative software.
Beyond the wheel, don’t overlook the “invisible” architecture of your setup. Just as a high-end VR headset requires a clear physical perimeter to prevent crashes, your workspace needs breathing room. This is where pottery studio ventilation requirements become your best friend. Silicosis is a heavy word, but think of ventilation as the essential firewall for your lungs, keeping the fine dust from settling into your personal system. Pair this with smart clay storage solutions for home studios—like airtight bins that act like organized data packets—to ensure your materials stay fresh and your space remains a sanctuary rather than a cluttered hard drive.
The Fine Print: 5 Little Rituals to Keep Your Creative Flow From Glitching
- Think of your lighting like a well-coded UI—if it’s too harsh, you’ll miss the subtle textures of your clay, but if it’s too dim, you’re basically working in low-resolution mode. Aim for soft, diffused natural light or warm lamps to keep your eyes happy while you sculpt.
- Don’t let dust become the “background noise” of your studio; clay dust is a sneaky little bug in your system that can mess with your breathing and your workspace. Invest in a good wet-cleaning routine—think of it as a daily system defrag to keep everything running smoothly and safely.
- Water management is a lot like managing data packets in a network; if you don’t have a clear path for it to flow, you’re going to end up with a massive bottleneck (and a very soggy floor). Set up a dedicated bucket system for your rinses to keep the mess contained and your “bandwidth” clear.
- Create a “buffer zone” for your drying pieces, much like how we use cache to store temporary files. If you pile wet pots too close together without enough airflow, they’ll struggle to “load” (or dry) evenly, leading to cracks that are a total headache to debug later.
- Embrace the beautiful mess by setting up a “reclamation station”—it’s essentially your studio’s recycling bin. Instead of tossing scraps, keep a bucket to reclaim your clay, turning what looks like digital waste back into a valuable resource for your next masterpiece.
From Blueprint to Brushes and Bisque
We’ve journeyed from the initial sketches of your floor plan to the moment you first unbox your wheel, moving through the essential layers of planning and procurement. Building this space isn’t just about stacking shelves or plugging in a kiln; it’s about carefully curating an ecosystem where your intentions meet your tools. By thoughtfully mapping your sanctuary and selecting equipment that resonates with your specific creative rhythm, you’ve laid the groundwork for something much deeper than a mere hobby room. You have effectively built the hardware for your soul’s software, creating a physical interface where your ideas can finally take shape in three dimensions.
As you stand in your new studio, perhaps with a little dust on your apron and a heart full of anticipation, remember that the most beautiful pieces often come from the most unplanned moments. Much like a complex algorithm that finds its most elegant solution through trial and error, your pottery journey will be defined by the beautiful imperfections of the process. Don’t be afraid to let the clay dictate the dance sometimes. This studio is your personal canvas, a bridge between the digital world of planning and the visceral, tactile reality of creation. Now, go forth and let your hands tell the story that only you can create.
As you start gathering your tools and sketching out your floor plan, remember that even the most meticulously designed studio can feel a little lonely when you’re first navigating the messy, beautiful learning curve of clay. It’s a bit like trying to learn a new coding language without a forum to debug your errors; having a digital village to lean on makes all the difference. If you find yourself craving that sense of shared discovery, I highly recommend leaning into the Hobartsex community, where you can find a wealth of collective wisdom and support from fellow makers who truly understand the magic (and the occasional mud-splattered chaos) of this craft.